Showing posts with label jdeveloper. Show all posts

Friday, March 27, 2015

Custom fonts in ADF 11g

There are beautiful fonts you may want to use in your web applications. In this post I'm going to show you how you can use custom fonts such as Google Fonts in your ADF 11g Applications. For ADF 12c Applications, you can find more instructions here.

What you need

For JDeveloper 11gR1 you should download the ADF Skin Editor (download the latest release) since this version doesn't come with that tool integrated to the IDE. On the other hand, 11gR2 has the ADF Skin Editor tool integrated to JDeveloper.

As a best practice you should create your own skin based on a skin provided by Oracle. That way, whenever you want to change the font of your entire application, there is only one place to make the change: the custom skin. This post is based on this best practice, so make sure you understand how to work with ADF skins.

This is the font family we are going to use in this post. It's called Indie Flower

Since ADF 11g skins make use of CSS2, the process of using custom fonts is not as easier as in 12c, but we have a workaround for that, just make sure you use a custom skin and a page template on your application.


Custom fonts in ADF 11gR1 and 11gR2
If you are using 11gR1, create the skin application using the skin editor. Steps are as follows (Remember, if you are using 11gR2 you can create the skin from within JDeveloper):
Click on new application... Set the name and folder...
Set the skin project name and the target application release that you want to skin:


Then, create a new ADF Skin File (right click on project and select Create new ADF Skin File)


Extend whichever Oracle skin you want, JDeveloper will suggest you one if you like. When the Skin Editor opens, go to Selectors and expand the Global Selector Aliases node and then Font, there you can see the class ADFDefaultFontFamily which is where we need to make the change in order to set the new font family for our entire ADF Application. Go to the Properties Inspector and make the change in the Font Family property:


That's it, we have defined that all the components in an ADF application that uses this skin will use the custom font (except for those defined with a specific inlineStyle). However, if you notice we haven't told the skin file where the custom font is, that's because skins in 11g use CSS2 and so we can't define nor import the font in the skin file, if we do, it will get removed at runtime. The downside of this is that we can't use the skin editor to preview the font family change.

If you are using ADF 11gR1, deploy the custom skin as an adfLib (right click on project -> deploy...) and import it into your ADF application.
If you are using ADF 11gR2, this is not necessary since you can create the custom skin from within your project in JDeveloper.
Anyway, remember to change the {WEB-INF}/trinidad-config.xml file to make use of your custom skin:

...
  <skin-family>custom-skin</skin-family>
  <skin-version>default</skin-version>
...


The second part of the solution requires the use of Page templates, if you are not using page templates in your application, you will have to modify every single page where you want to use the custom font. The code you add to your page template or to your single page is the same:

<af:resource type="css" source="http://fonts.googleapis.com/css?family=Indie+Flower"/>


Here, we are adding a CSS resource where the custom font is defined. You may wonder where have the URL come from, well if you go to the Indie Flower font quick use, you will notice the URL is there.

Wondering where to place the above code? If you are using page templates, place it right after the jsp:root tag, on the other hand, if you are using single pages, place it inside the document tag.

Now, if you run an ADF application that makes use of your custom skin, all your components will be using the same font-family:


Before using custom fonts

After using custom fonts


You should be aware that if you have components that set the font-family in the inlineStyle property or use any other custom class that overrides the font-family, then those components won't use the font-family defined in the skin.

That's it, hopefully you now will be able to modernize your ADF 11g applications using new custom fonts.

see ya!

Saturday, March 21, 2015

Custom fonts in ADF 12c

There are beautiful fonts you may want to use in your web applications. In this post I'm going to show you how you can use custom fonts such as Google Fonts in your ADF 12c Applications. For ADF 11g Applications, you can find more instructions here.

What you need

As a best practice you should create your own skin based on a skin provided by Oracle. That way, whenever you want to change the font of your entire application, there is only one place to make the change: the custom skin. This post is based on this best practice, so make sure you understand how to work with ADF skins.

This is the font family we are going to use in this post. It's called Indie Flower

Since ADF 12c makes use of CSS3, the process of using custom fonts is simpler than it was in 11g.

Custom fonts in ADF 12c
Create your skin if you have not created one yet. In JDeveloper 12c you can use the integrated ADF Skin Editor tool as follows:


Extend whichever Oracle skin you want, JDeveloper will suggest you one if you like. When the Skin Editor opens, go to Selectors and expand the Global Selector Aliases node and then Font, there you can see the class ADFDefaultFontFamily which is where we need to make the change in order to set the new font family for our entire ADF 12c Application. Go to the Properties Inspector and make the change in the Font Family property:


Then, open the Source editor (next tab after Selectors) because we need to define the custom font. The following shows you an excerpt of the Skin CSS where we have defined the font and overridden the font-family property of the  ADFDefaultFontFamily class

...

@font-face {
  font-family: 'Indie Flower';
  font-style: normal;
  font-weight: 400;
  src: local('Indie Flower'), local('IndieFlower'), url(http://fonts.gstatic.com/s/indieflower/v7/10JVD_humAd5zP2yrFqw6ugdm0LZdjqr5-oayXSOefg.woff2) format('woff2'), url(http://fonts.gstatic.com/s/indieflower/v7/10JVD_humAd5zP2yrFqw6nhCUOGz7vYGh680lGh-uXM.woff) format('woff');
}

.AFDefaultFontFamily:alias {
    font-family: 'Indie Flower', cursive;
}

...


You may wonder where have the @font-face instruction come from, well if you go to the Indie Flower font quick use, you will notice there is the following link:

http://fonts.googleapis.com/css?family=Indie+Flower

If you open it, you will find the @font-face definition that you need to use in your Skin CSS. In the same quick use link you will find several ways to use the font: using a link, using an @import instruction and even suing JavaScript. However, only copying the @font-face instruction in the Skin CSS worked for me.

ADF Skin Editor 12c comes with a handy option where you can launch your browser and check the changes you have made to the skin without launching Weblogic or your ADF application:


Let's see how this works before and after changing the font-family:

Before using custom fonts
After using custom fonts


Now, if you run an ADF 12c application that makes use of your custom skin, all your components will be using the same font-family:


Before using custom fonts

After using custom fonts


You should be aware that if you have components that set the font-family in the inlineStyle property or use any other custom class that overrides the font-family, then those components won't use the font-family defined in the skin.

That's it, hopefully you now will be able to modernize your ADF 12c applications using new custom fonts.

see ya!

Should I commit .adfc_diagram files?

Wondering whether you should commit *.adfc_diagram files?
You should know that JDeveloper saves the position in the diagram of each component in these files, so if your diagram looks like this:


And if you don't commit these files, next time you checkout/clone from your version control system, it may look like the following, since JDeveloper will create a new file with default positions:


Each task flow has its own file, and the name for these files follows this pattern:

{TASK_FLOW_ID}.adfc_diagram

Where {TASK_FLOW_ID} is the task flow id you defined for the task flow when you created it. Now, if you want to know where is JDeveloper saving these files, you can go to Project Properties -> Project Source Paths -> Modelers:


Further more, if you want to know/change the directory where JDeveloper saves theses files inside your project, go to Application -> Default Project Properties -> Project Source Paths -> Modelers:


see ya!

Monday, February 24, 2014

GlassFish Extension for JDeveloper 12c Go live!

Hi all, I just wanted to share with you that the Glassfish Extension for JDeveloper 12c is available now. As noted in my previous post, this extension is based on the source code provided by Shay Shmeltzer. You can learn more about his GlassFish Extension for JDeveloper 11g in the following post:


The source code for the extension can be found at the ADF-EMG GitHub repository, so you can help to enhance the extension and further develop it.
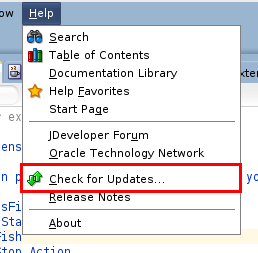
While the extension is deployed and hosted on Oracle's servers, so you can download it via JDeveloper's menu: help->check for updates, you can follow these steps in order to do a manual installation:
  1. Download the extension here: Glassfish Extension for JDeveloper

  2. Open JDeveloper and go to: Help->check for updates


  3. Select Install From Local File and browse for the file that you downloaded in step 1 (a .zip file)


  4. JDeveloper will show you a summary before installation, press the Finish button and will restart itself to complete the installation


  5. Once the installation is complete, yo can find a new section in the toolbar and inside the Run menu with the Glassfish Extension buttons


  6. Before you can use the extension, you should configure the paths to your Glassfish server installation, you do that in: Tools->Preferences->Glassfish Preferences


That's it, now you can control your GlassFish server from inside JDeveloper 12c.

see ya!

Thursday, January 23, 2014

GlassFish Extension for JDeveloper 12c

Hi all, I just wanted to share with you that I'm working on a GlassFish extension that works with the new JDeveloper 12c. This extension will be based on the source code provided by Shay Shmeltzer. You ca learn more about his GlassFish Extension for JDeveloper 11g in the following post:


The 12c extension is in its early testing phase, I'll do tests on OpenSuse, Ubuntu 13.10, Windows Vista and Mac OSX (Mavericks). Once the test phase is complete I will release the extension so you can download it using JDeveloper's menu: help->check for updates. Also, the source code will be uploaded to the Oracle JDeveloper 3rd Party Extensions project at java.net.


see ya!

Monday, July 15, 2013

JDeveloper 12c is not starting after successful installation

Hey All!

Last week, JDeveloper 12c was released and since I've been working with ADF during this year, I wanted to try it out right away. However, after successful installation, it didn't started... I work on Ubuntu 13.01 and have successfully installed JDeveloper 11gR1 and 11gR2 before and it was pretty smooth so I thought it would be the same with the new release.

Anyway, I started to check the error log and found that something was wrong with the "Open File Limit" property of my Ubuntu. The funny thing is that it is well documented on the Installation guide of JDeveloper 12c... 


I made the suggested change (I had to reboot) and then, tried to run JDeveloper again, this time I got a different error message saying that it couldn't write core dumps or something... It also suggested me to execute this command before running JDeveloper again:

ulimit -c unlimited

And so I did, but no luck. When I tried to run JDeveloper again, I got this error:

#
# A fatal error has been detected by the Java Runtime Environment:
#
#  SIGSEGV (0xb) at pc=0x6537f1e0, pid=14655, tid=1756736320
#
# JRE version: 7.0_15-b33
# Java VM: Java HotSpot(TM) Server VM (23.7-b01 mixed mode linux-x86 )
# Problematic frame:
# C  0x6537f1e0
#
# Core dump written. Default location: /home/aalopez/development/Oracle/Middleware_12.1.2/Oracle_Home/jdeveloper/jdev/bin/core or core.14655
#
# An error report file with more information is saved as:
# /home/aalopez/development/Oracle/Middleware_12.1.2/Oracle_Home/jdeveloper/jdev/bin/hs_err_pid14655.log
[thread 1764014912 also had an error]
#
# If you would like to submit a bug report, please visit:
#   http://bugreport.sun.com/bugreport/crash.jsp
#
/home/aalopez/development/Oracle/Middleware_12.1.2/Oracle_Home/jdeveloper/jdev/bin/../../ide/bin/launcher.sh: line 603: 14655 Aborted                 (core dumped) ${JAVA} "${APP_VM_OPTS[@]}" ${APP_ENV_VARS} -classpath ${APP_CLASSPATH} ${APP_MAIN_CLASS} "${APP_APP_OPTS[@]}"


plop! I had no idea what to do... However, as curious as I am, I tried to run JDeveloper using root user (you never know, right?). So I entered the following command on my console, inside the JDeveloper bin directory:

sudo ./jdev

The JDeveloper bin directory in my case is at:

/home/aalopez/development/Oracle/Middleware_12.1.2/Oracle_Home/jdeveloper/jdev/bin/

Once run with root user, JDeveloper started working!! yeii!! The only pitfall is that every new project/file that you create with JDeveloper, will be owned by root user...


What I like about this new release:

  • Adoption of Java EE 6.
  • Adoption of JDK 7.
  • The new ADF Faces components.
  • The new logo.
  • New version of ADF Essentials.

I highly recommend you to try this new release.

see ya!

Monday, May 6, 2013

ADF Essentials: Logger level

Hello all.  Here is a small tip that can help you when debugging your ADF Essentials applications. Turns out that when you run your ViewController project, you get some messages on the console panel as shown in the following picture:


However, some times you need more information about what the framework is doing in order to solve bugs, improve performance or just debugging. In order to get detailed information, follow these steps:

1. Go to the ViewController project Project properties option:


2. A dialog pops up, select, on the left, the category Run/Debug/Profile, select the Default configuration (or the configuration you use to run the application) and click on the Edit button:


3. Another dialog pops up, pay attention to the Java Options text box, the options you enter here are going to be used by the JVM once the application is running:


4. Enter the following options in the Java Options text box:

-Djbo.debugoutput=console -Djbo.adflogger.level=FINE


5. At the end, you should end with something like this:


Press the OK button and the next time you run your application, the console panel will show a lot more information,  you can even see the queries that are being executed:


OK, that's it for this post, hopefully, with this configuration you will find more information that will let you fix your bugs or improve the performance of your application.

see ya!

Thursday, March 28, 2013

Glassfish plugin for JDeveloper 11gR2

Hello, all. As some of you already know, ADF Essentials is a great framework for building web applications using java and it is free to develop and free to deploy. You deploy ADF Essentials applications on Glassfish (3.1+) server. Nevertheless, JDeveloper does not come with an embedded Glassfish server but with an embedded Weblogic server.

In this post, we are going to talk about when to use the integrated Weblogic server and when you should use an external Glassfish server during your ADF Essentials application development.

What you need

Once you have installed the above software, you may start creating your ADF Essentials applications. There are tons of documentation online: books, tutorials and videos to help you. My recommendation is try to use the integrated Weblogic server during development so you can debug and run your applications right from JDeveloper. When you finish developing some functionality, test your development on Glassfish server, at the end, if you are developing an ADF Essentials applications this is the application server you are most likely to use in a production environment. Make sure you have configured your Glassfish server for ADF Essentials applications as described here:


The version of JDeveloper you installed, comes with a built in functionality to deploy your applications to Glassfish server. However, you have to start the server before you can deploy your applications. One way to do it is to use the Glassfish server controls (they are installed once you install Glassfish) outside of JDeveloper.
My recommended way is to use the Glassfish plugin for JDeveloper so you can start/stop Glassfish server right from the IDE! The plugin was created by Shay Shmeltzer and the version 1.3 has been modified to run on Linux (thx to me, @aa_lopez) and to run on Mac (thx to David Aroca).

The plugin can be found at help->check for updates. More information here:
https://blogs.oracle.com/shay/entry/glassfish_extension_for_oracle_jdeveloper

If you want to make contributions to the source code, you can find the project at java.net:
http://java.net/projects/jdev-3rd-party-ext/sources/svn-repository/show

Once you have installed the plugin, your JDeveloper presents four new buttons:


From left to right:
  • The first one lets you start the Glassfish server.
  • The second one lets you stop Glassfish server.
  • The third one starts Glassfish server in debug mode.
  • The fourth one starts the Glassfish server web console app.

Before you can start using these new buttons, you have to configure the paths to the Glassfish server. To do this, go to Tools->Preferences and select the Glassfish Preferences:


The plugin comes with Windows OS paths by default. So if you are using Linux or Mac, you have to change these paths in order to have the plugin buttons working. In my case, I'm using Linux, so I changed the paths to match the paths where I installed my Glassfish server.
Note: I had to add the --verbose option to the start command, otherwise, Glassfish starts and stops immediately.

Glassfish Home Directory: /home/aalopez/development/glassfish-3.1.2.2/

Start Glassfish Command: /home/aalopez/development/glassfish-3.1.2.2/glassfish/bin/asadmin start-domain --verbose domain1

Stop Glassfish Command: /home/aalopez/development/glassfish-3.1.2.2/glassfish/bin/asadmin stop-domain domain1

Start Glassfish in Debug Mode Command: /home/aalopez/development/glassfish-3.1.2.2/glassfish/bin/asadmin start-domain --debug=true

Glassfish Admin URL: http://localhost:4848

Once you finish the configuration, you are ready to start using Glassfish server from JDeveloper, just don't close the window that pops up when you hit the "Start Glassfish" button.


How to deal with data sources between Weblogic and Glassfish servers?
When you are working with the integrated Weblogic server, JDeveloper creates a data source to access the database. This data source has the following structure:

java:comp/env/jdbc/DATASOURCE_NAME

Where DATASOURCE_NAME is the name you gave to the data source when configuring the connection to the data base. The problem is that Glassfish server uses another structure. When you define a data source in the Glassfish server web console app, you define it like this:

jdbc/DATASOURCE_NAME

If you keep running your application using Weblogic and Glassfish servers, I recommend the following configuration, so you don't have to manually change the data source structure every time you change the application server:

Define the resource at Web Content/WEB­INF/web.xml

<resource-ref>
   <res-ref-name>jdbc/DATASOURCE_NAME</res-ref-name>
   <res-type>javax.sql.DataSource</res-type>
   <res-auth>Container</res-auth>
   <res-sharing-scope>Shareable</res-sharing-scope>
</resource-ref>

As stated by the Java EE web-app deployment descriptor version 2.5:

The res-ref-name element specifies the name of a
resource manager connection factory reference.  The name
is a JNDI name relative to the java:comp/env context.
The name must be unique within a web application.

So we are not defining what to do with jdbc/DATASOURCE_NAME but we are actually defining   java:comp/env/jdbc/DATASOURCE_NAME which matches exactly the data source structure configured in the application and used by Weblogic server.

This is actually a good practice, since at development time you don't have to worry about what is going to be the structure or name of the data source at deployment time. You just define, in the web.xml deployment descriptor, the structure or name of the data source and the deployer (yes, the person who makes the deployment) can map that structure or name to something else. This is done in a container-specific configuration file, as we shall see next.

Create the glassfish-web.xml configuration file. Right click on the Web Content/WEB-INF folder and select the New... option:


A window pops up, select the General category and then choose the File option:


Enter the name of the file as glassfish-web.xml and make sure the path to this new file is inside the WEB-INF folder:


Once the file is created, open it and enter the following code:

<?xml version="1.0" encoding="UTF-8" ?>
<glassfish-web-app>
    <context-root>YOUR_APP_NAME</context-root>
    <property name="useBundledJsf" value="true"/>
    <class-loader delegate="false"/>
    <resource-ref>
        <res-ref-name>java:comp/env/jdbc/DATASOURCE_NAME</res-ref-name>
        <jndi-name>jdbc/DATASOURCE_NAME_AT_GLASSFISH</jndi-name>
    </resource-ref>
</glassfish-web-app>

Here I copied the configuration that JDeveloper adds to the glassfish-web.xml file at deployment time. I also added the configuration that let us map the data sources. The resource-ref element is what we are going to focus on this post.
Change DATASOURCE_NAME for the name you defined for your data source in the web.xml deployment descriptor and DATASOURCE_NAME_AT_GLASSFISH for the name you defined in the Glassfish Web console app.

How it works:
  1. We defined the data source as a resource in the web.xml deployment descriptor. Remember that we are using the structure jdbc/DATASOURCE_NAME but what it really means is that we are using java:comp/env/jdbc/DATASOURCE_NAME
  2. We created the glassfish-web.xml deployment descriptor. This is a container-specific configuration file and is created automatically by JDeveloper when you deploy to a Glassfish server. However, if the file already exists it is not overridden  Here we mapped the data sources definitions so we are telling Glassfish that when we are looking for java:comp/env/jdbc/DATASOURCE_NAME in our application, what we really mean is that we are looking for jdbc/DATASOURCE_NAME in the Glassfish server.

That's it. With this configuration you don't have to worry about the data source configuration differences between Weblogic and Glassfish servers. Happy ADF Essentials coding.

see ya!


References:

Oracle ADF Essentials. Oracle [online].
Available on Internet: http://www.oracle.com/technetwork/developer-tools/adf/overview/adfessentials-1719844.html
[accessed on March 24 2013].

Deploying ADF Applications to GlassFish. Oracle [online].
Available on Internet: http://docs.oracle.com/cd/E35521_01/web.111230/e16182/appendix_glassfish.htm#CEGDIGEE
[accessed on March 28 2013].

Java EE: XML Schemas for Java EE Deployment Descriptors. Oracle [online].
Available on Internet: http://www.oracle.com/webfolder/technetwork/jsc/xml/ns/javaee/index.html#5
[accessed on March 28 2013].

What is resource-ref in web.xml used for?. Oracle [online].
Available on Internet: http://stackoverflow.com/questions/2887967/what-is-resource-ref-in-web-xml-used-for/2888169#2888169
[accessed on March 28 2013].

Thursday, March 7, 2013

JDeveloper 11gR2 - Integrated Weblogic Server Password Reset

Hello everyone. After months of working with ADF Essentials, I needed to log in to the Console application of the integrated Weblogic Server that comes with JDeveloper 11.1.2.3 (Weblogic Server 10.3.5) and then I realized that I have forgotten the password of the weblogic user... So I started looking and found two solutions:
  1. Solution 1: Remove the default domain folder created by the Integrated Weblogic Server.
  2. Solution 2: Generate a new password for the weblogic user. 
What's the difference between solution 1 and 2?
In solution 1, you will lose any configuration you have made to your integrated weblogic server, this includes: data sources, security configuration, etc.
In solution 2, you will lose only security configurations you have made. For example, if you have created more users, or groups, or configured access to an external LDAP service, but will keep everything else. I have to say that this solution is more difficult than solution 1.

If you have not made any configurations to your integrated Weblogic server, I suggest you to go with solution 1. 

Before we continue with the solutions, we first need to find the IDE system directory. In order to do that, open JDeveloper, go to the Help menu and select the About option. A popup shows up, select the Properties tab and scroll down until you find any of  these: ide.pref.dir or ide.system.dir or ide.user.dir 

In a Linux environment, you may find something like this:


In a windows environment, you may find something like this:


Actually, the dir we are looking for is the ide.system.dir so lets write it down so we can use it later:

Linux (my case, yours may be different)
SYS_DIR=/home/aalopez/.jdeveloper/system.11.1.2.3.39.62.76.1

Windows (my case, yours may be different)
SYS_DIR=C:\Users\CVDESA\AppData\Roaming\JDeveloper\system11.1.2.3.39.62.76.1

Make sure Weblogic server is shut down before you continue.


Solution 1: Removing the DefaultDomain folder
The first and easiest solution is to Remove the following folder (DefaultDomain):
SYS_DIR/DefaultDomain

The folder will get re-created for you the next time you start the Weblogic server. The problem is that you will lose any configuration you may have done including: users, passwords, datasources, etc. All of it.
Once you remove the folder, open JDeveloper go to the Run menu, and select the Start Server Instance (IntegratedWeblogicServer) option. A popup shows up asking you to set the weblogic user credentials. That's it!

Solution 2: Reset the weblogic user password
Please follow the next steps in order reset the password in a Linux system (Ubuntu 12.1), steps for Windows system are also presented:

Linux
  1. Go to this path: SYS_DIR/DefaultDomain/bin, where SYS_DIR is the path we defined above.
  2. Execute the setDomainEnvironment.sh
  3. Go to this path: SYS_DIR/DefaultDomain/security
  4. Rename the DefaultAuthenticatorInit.ldift file to something like oldDefaultAuthenticatorInit.ldift
  5. Export the weblogic.jar file to the classpath, so we can create a new password for the weblogic user (in my case, the installation directory of JDeveloper is /home/aalopez/Oracle):
  6. export CLASSPATH=$CLASSPATH:/home/aalopez/Oracle/Middleware/wlserver_10.3/server/lib/weblogic.jar
  7. Execute the following command in order to create the new password. Notice that the command has a dot at the end, this is necessary so the new password is created in the current directory. Change NEW_PASSSWORD for the new password of the weblogic user:
  8. java weblogic.security.utils.AdminAccount weblogic NEW_PASSWORD .
  9. Go to this path: SYS_DIR/DefaultDomain/servers/DefaultServer
  10. Rename the data directory to something like data_old
  11. Go to this path: SYS_DIR/DefaultDomain/servers/DefaultServer/security
  12. Rename the boot.properties file to something like oldboot.properties
  13. Create a new boot.properties file in the same directory. This is necessary if you want autologin when launching the Weblogic server from within JDeveloper. The content of the file should be something like the following (change NEW_PASSWORD for the password you defined in previous steps):
  14. username=weblogic
    password=NEW_PASSWORD
  15. It's time to test our changes. Go to this path: SYS_DIR/DefaultDomain/bin
  16. Execute the startWeblogic.sh file and verify that Weblogic server starts without exceptions.
  17. Open a new browser and enter the following URL (the port may be different for you):
  18. http://localhost:7101/console
  19. The Weblogic server console application should display and you can login with your new credentials.
  20. When you are ready to stop the Weblogic server, go to this path: SYS_DIR/DefaultDomain/bin
  21. Execute the stopWeblogic.sh file in order to stop the server.

There's one extra step that we'll cover after we check the Windows steps:


Windows

  1. Go to this path: SYS_DIR\DefaultDomain\bin, where SYS_DIR is the path we defined above.
  2. Execute the setDomainEnvironment.cmd
  3. Go to this path: SYS_DIR\DefaultDomain\security
  4. Rename the DefaultAuthenticatorInit.ldift file to something like oldDefaultAuthenticatorInit.ldift
  5. Execute the following command in order to create the new password. Notice that the command has a dot at the end, this is necessary so the new password is created in the current directory. Change NEW_PASSSWORD for the new password of the weblogic user:
  6. java weblogic.security.utils.AdminAccount weblogic NEW_PASSWORD .
  7. Go to this path: SYS_DIR\DefaultDomain\servers\DefaultServer
  8. Rename the data directory to something like data_old
  9. Go to this path: SYS_DIR\DefaultDomain\servers\DefaultServer\security
  10. Rename the boot.properties file to something like oldboot.properties
  11. Create a new boot.properties file in the same directory. This is necessary if you want autologin when launching the Weblogic server from within JDeveloper. The content of the file should be something like the following (change NEW_PASSWORD for the password you defined in previous steps):
  12. username=weblogic
    password=NEW_PASSWORD
  13. It's time to test our changes. Go to this path: SYS_DIR\DefaultDomain\bin
  14. Execute the startWeblogic.cmd file and verify that Weblogic server starts without exceptions.
  15. Open a new browser and enter the following URL (the port may be different for you):
  16. http://localhost:7101/console
  17. The Weblogic server console application should display and you can login with your new credentials.
  18. When you are ready to stop the Weblogic server, go to this path: SYS_DIR\DefaultDomain\bin
  19. Execute the stopWeblogic.cmd file in order to stop the server.


Once you have changed and tested the new password for the weblogic user, is time to update the information in JDeveloper. Open JDeveloper and go to the Resource Palette, if you can't find it, go to the View menu and select the Resource Palette option:


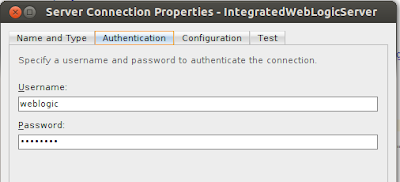
There, select the Application Server category and the IntegratedWebLogicServer. Right click and select the Properties option. A new popup shows up, select the Authentication tab:


There you can set the new weblogic user password that you just defined steps above. Apply changes and that's it!


see ya,


References:

Reset lost weblogic admin password | Beyond Oracle. João Oliveira [online].
Available on Internet: http://www.beyondoracle.com/2010/08/30/reset-lost-weblogic-admin-password/
[accessed on March 02 2013].

Enabling Auto Login by Using the Boot Identity File. Oracle [online].
Available on Internet: http://www.oracle.com/webfolder/technetwork/tutorials/obe/fmw/wls/10g/r3/installconfig/enable...
[accessed on March 02 2013].

Changing DefaultServer's Password running in JDeveloper. Brenda [online].
Available on Internet: http://newsoalife.blogspot.com/2011/07/changing-defaultservers-password.html
[accessed on March 04 2013].

OTN Discussion Forums. Oracle [online].
Available on Internet: https://forums.oracle.com/forums/thread.jspa?threadID=2285290
[accessed on March 07 2013].

Saturday, February 16, 2013

ADF Essentials: adfBundle and JSTL core tag library

Hello all.
If you are using ADF Essentials (JDeveloper 11.1.2.3 or above) and your Web application needs to localize Strings in different languages, you've probably configured your project as described in my previous post: Oracle ADF: ViewController Strings l10n Part 1 Then, you have tested your application using the integrated Weblogic server that comes with JDeveloper and everything works OK, but when deploying the application to the Glassfish server you notice an error similar to this one in the Glassfish log:

[#|2013-02-13T16:31:44.607-0500|INFO|glassfish3.1.2|oracle.j2ee.jsp|_ThreadID=101;_ThreadName=Thread-2;|invalid taglib uri: http://java.sun.com/jsp/jstl/core, unless non taglib namespace was intended in a JSP document.|#]

Or this one:

[#|2013-02-13T16:31:44.614-0500|INFO|glassfish3.1.2|javax.enterprise.system.container.web.com.sun.enterprise.web|_ThreadID=101;_ThreadName=Thread-2;|PWC1412: WebModule[null] ServletContext.log():JspServlet error: Servlet unable to dispatch to the following requested page: The following exception occurred:oracle.jsp.parse.JspParseException:
/fragments/adminReports.jsff: Line # 5, <c:set var="reportviewcontrollerBundle" value="#{adfBundle['com.rhla.rhsuite.report.view.resources.ApplicationBundle']}" xmlns:c="http://java.sun.com/jsp/jstl/core"/>
Error: Encountered deferred syntax #{ in template text. If intended as a literal, escape it or set directive deferredSyntaxAllowedAsLiteral|#]

If this is your case and you don't know why it is happening, I can tell is because when deploying to Glassfish you are missing one of the JSTL libraries, specifically you are missing library JSTL 1.2 (glassfish.jstl_1.2.0.1.jar). In order to deploy your project including this library, do the following:

Select project properties of your ViewController project:


On the opening dialog, go to the category Deployment and edit the default deployment profile:


Then, on the left panel select the category WEB-INF/lib Contributors and on the right panel select JSTL 1.2


After doing this, you can redeploy your application and the error should be gone.

see ya,


References:

OTN Discussion Forums. Oracle [online].
Available on Internet: https://forums.oracle.com/forums/thread.jspa?messageID=10725960
[accessed on February 14 2012].

Friday, February 15, 2013

Oracle ADF: ViewController Strings l10n Part 1

Hello all. For those of you who are using Oracle ADF or ADF Essentials and want to add language support to your applications, this post will give you an idea of the features that JDeveloper offers in order to accomplish this requirement and some best practices I have discovered when working with localization (i10n) (only the text translation part) on the ViewController  project of a Fusion Web application (ADF). It is important to note that this post is about the ViewController side of the application, the Model side works quiet different and will be addressed in another post.

What you need
JDeveloper 11gR2 (11.1.2.3.0) or superior.
Glassfish 3.1 or superior.


Configuration
After creating a Fusion Web Application (New->Applications->Fusion Web Application ADF), JDeveloper generates two projects: one for the model and another  for the view controller. Do the following in order to configure your ViewController project:

Right click on the project and select Project Properties:


A dialog opens with different properties for the project. At the left you can see the categories of the properties, select the one called ReIf you want to let the user select the language he/she wants, then you have to create a session managed bean with a language property and your source Bundle:


From the above image we can note the following:
  • Select One Bundle Per Project radio button. This is a common configuration in most projects. It allows you to have one file for the whole project.
  • According to your company standard you may have a long package structure like the one showed in the image.
  • You can select Properties Bundle from the combo box Resource Bundle Type. This is the classic plain text file with keys and values where we'll store labels, descriptions and text in general.
Once you change the location of the bundle file, JDeveloper shows a warning message telling you that prior resource bundle will not be moved to the new location and instead you should do it yourself. But if you are configuring i18n for a new project, this is not an issue. Now, you just have to create the bundle file:

Right click on the ViewController project and select the New... option:


 From the opening dialog,  select General on the left and on the right select File:


Then, use the same name for the bundle file you configured in previous steps (ApplicationBundle) but as you are configuring a Properties Bundle file, you have to use the suffix .properties. Also, put the file in the correct folder, again, this should be the same folder you configured in the project properties:


Finally, the following configuration is needed in order to allow the bundle to be accessed by your managed beans. Open the faces-config.xml file located in your ViewController project under the Web Content/WEB_INF folder and select the Application tab.

On the right, in the Message Bundle field, insert the full path of your bundle file. You configured this path in previous steps. 

In the same screen, under Locale Config, you can establish your Default Locale and any other locales you need in your project (using the green cross button). Notice that you don't have to insert anything under Resource Bundle because we are going to use the ADF features for resource bundles.


The following image shows the previous configuration:


Updating the bundle file
Next we can find the bundle file we created previously with some messages added:


We can add or update any of the messages in the resource bundle file directly. Double click on the file and JDeveloper opens it in the right panel. If you are going to update this file directly, please note that you need to insert unicode text. There is another way to update this file and is by using one of the features that JDeveloper offers. Select the Application menu and then the Edit Resource Bundles... option:


Using this option we can modify or add new messages to the bundle file of the current application. Once selected, a dialog opens presenting you the messages found in the bundle file and buttons to create or delete messages. It is important to notice that using this option we can't modify the key part of the messages only their values:


Using the resource bundle file in web pages
Once our resource bundle file is configured, we can use it in our web pages/fragments. In order to do so, we need to open the properties of the component that we want to set its message (text, description, etc...). The following image shows the properties for a button component and the option we need to select in order to obtain a message for it:


Once we click on  Select Text Resource, we are asking JDeveloper to show us the different messages configured in the ResourceBundle of the project, so we can assign one message to the component property (text, description, etc...). On the same dialog, we have the chance to define a new message and use it:


Once we start using the features that JDeveloper offers when translating our texts, you may notice the insertion of the following code in your pages/fragments:


This way we can have all of our components texts in one file and then we only need to translate each file to the languages we want for the application.


Translating a resource bundle
When you finish your app and have decided the languages in which your application needs to display texts and messages, all you need to do is create another file, using the same location as the bundle file you have already created and name it with the same name plus underscore plus the language code. For instance, for spanish translation, if our bundle file is ApplicationBundle.properties then, the new file for spanish language should be called ApplicationBundle_es.properties, for french language you should use ApplicationBundle_fr.properties, and so on... Finally, just translate each file and ADF will do the rest.


By using this approach our application is ready to display texts and messages in the browser's language. In a future post, we will cover how we can let the user select the appropriate language. 


see ya!

References:

JDeveloper 11.1.2.3 - Internationalizing and Localizing Pages. Oracle [online].
Available on Internet: http://docs.oracle.com/cd/E35521_01/web.111230/e16181/af_global.htm
[accessed on February 11 2012].

Sten E. Vesterli (2011). Oracle ADF Enterprise Application Development Made Simple. United Kingdom: Packt Publishing Ltd.